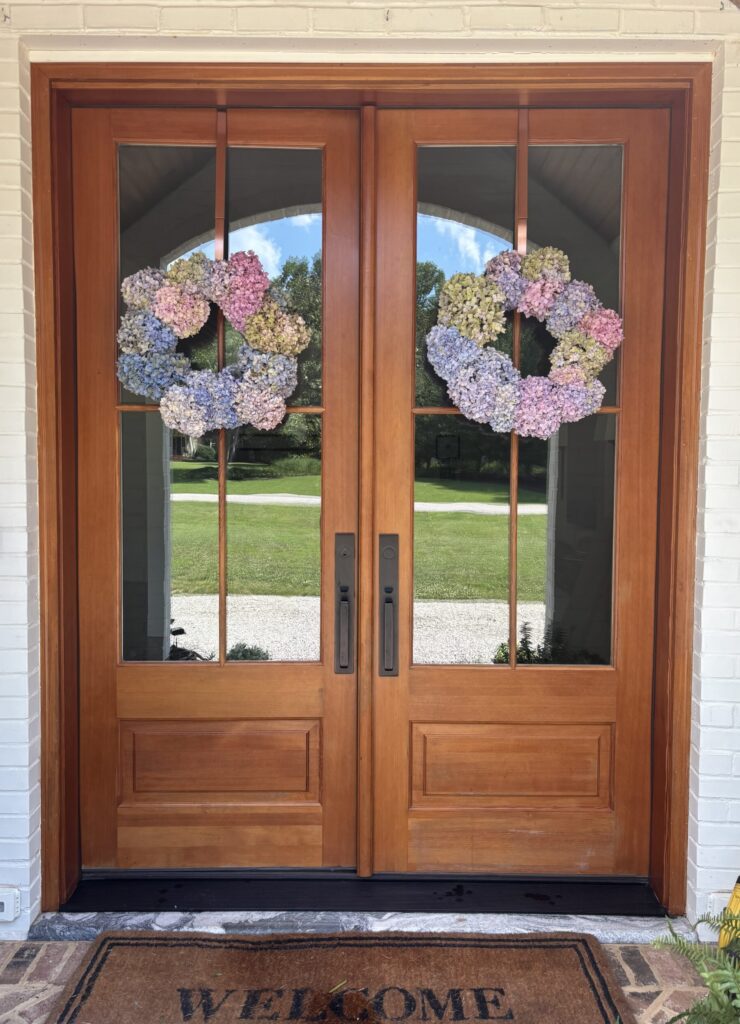
There’s nothing more welcoming in summer than a front porch/door with a fresh flower wreath, especially if you live in the south! Today I’m sharing a quick and simple DIY using flowers from your own yard. If you’ve got blooming hydrangeas, this is a beautiful and budget-friendly way to bring that garden charm to your front door.
I snapped some photos along the way because I want to show you that you can get an elevated look even if you aren’t a DIY-er. This is also a perfect and easy decor idea if you’re hosting a party/shower at your home and want something that will catch everyone’s attention!
Show stopping fresh flower wreath step-by-step
What You’ll Need:
Fresh hydrangea blooms
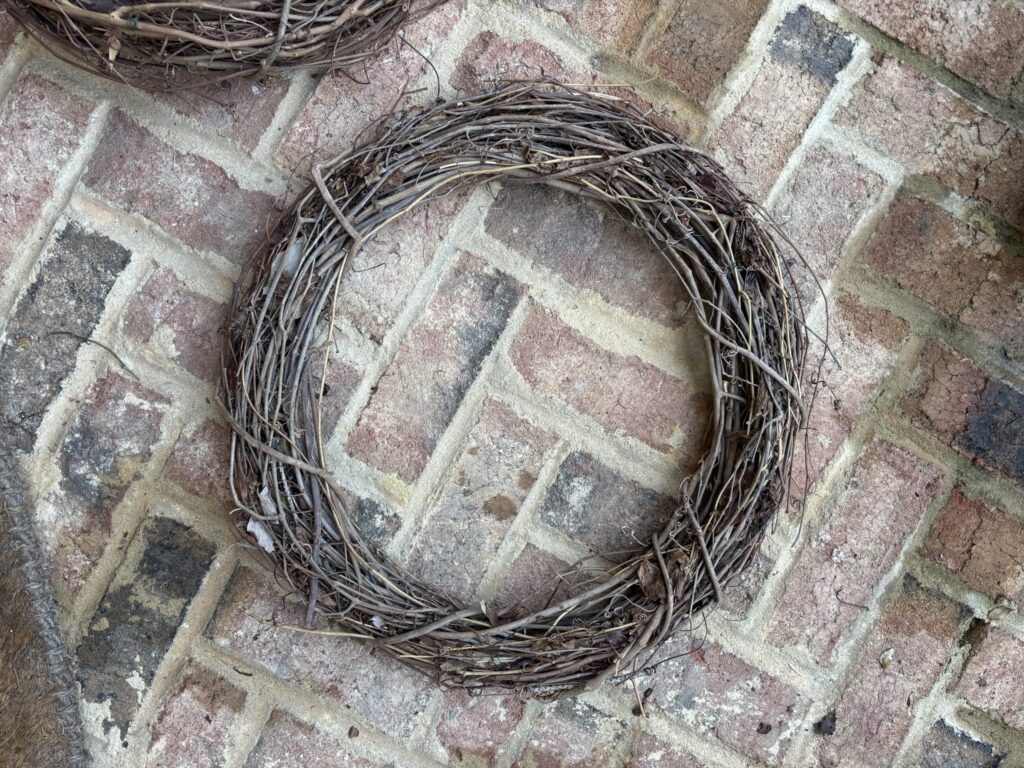
Grapevine wreath form (available at craft stores or online)
Floral shears or sharp scissors
Floral water tubes (these are like ones I have)
Wreath hanger (these are the ones I have)
Step 1: Prep
I make all of my wreaths myself. Mainly because it’s hard to find large wreaths that are actually full and don’t cost a fortune. With this, I’ve learned that grapevine wreaths are the perfect base to help achieve optimal fullness and to keep things in place without as much effort. I lay these out first and lay a few flowers on top so I can get an idea of how many stems I may need to fill to each one to be sure I’ve cut enough.
I have the 18 inch. For reference, I used about 12 stems/blooms per wreath. My hydrangeas produce some really big blooms so you may need a few more if you’re wanting to get a very full look but your blooms are a bit smaller.
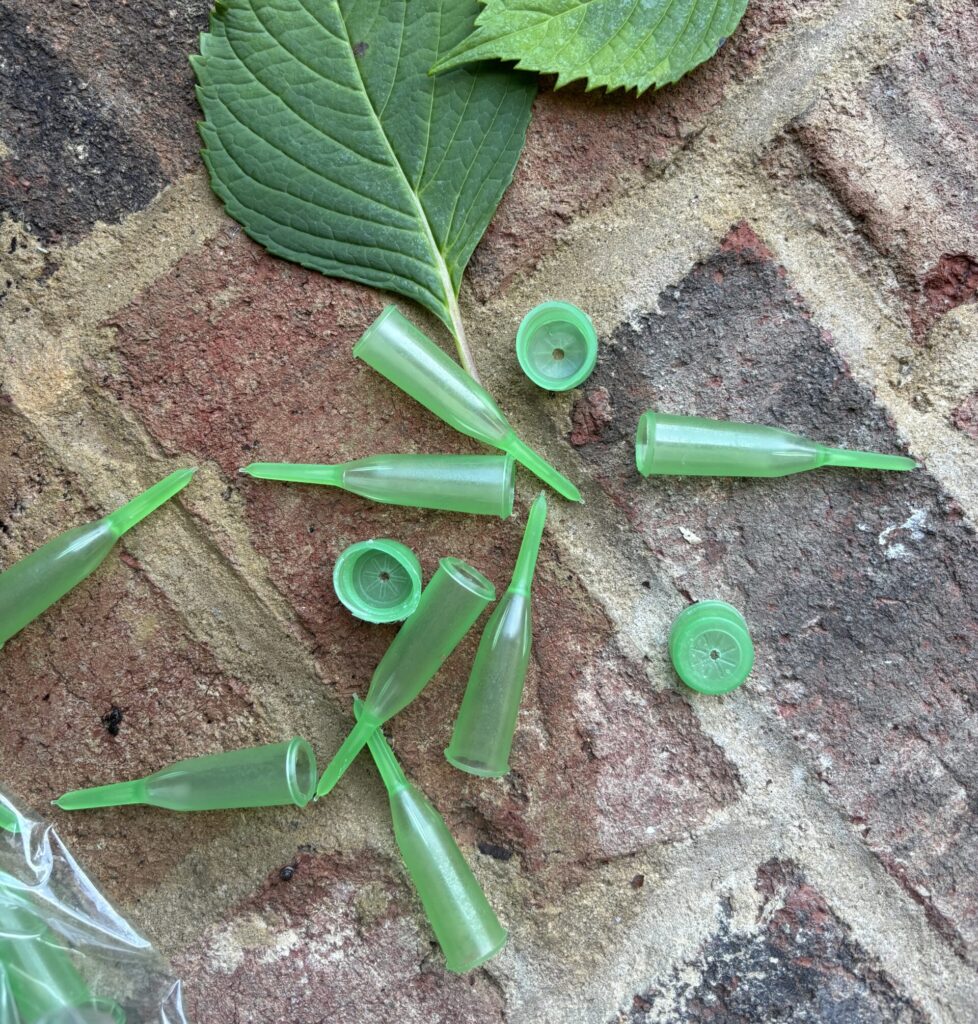
It’s ideal to pre-fill your tubes and put the tops on. I did not do this initially so I’m sharing the lesson learned with you! I kept finding myself with one hand holding my stem in place and then one hand trying to fill the tube with water and securing the top. That was annoying and slowed me down.
To do this I used a cup with water and would dip the tube in to fill it up and then pop the top on. The top is more of a silicone material but when you push it on you’ll feel it almost lock in place. It does a good job of not leaking! Piece of advice…don’t fill the tube to the very top, leave a little room. When you push the stems in the excess water will spray out.
Step 2: Cut Your Blooms
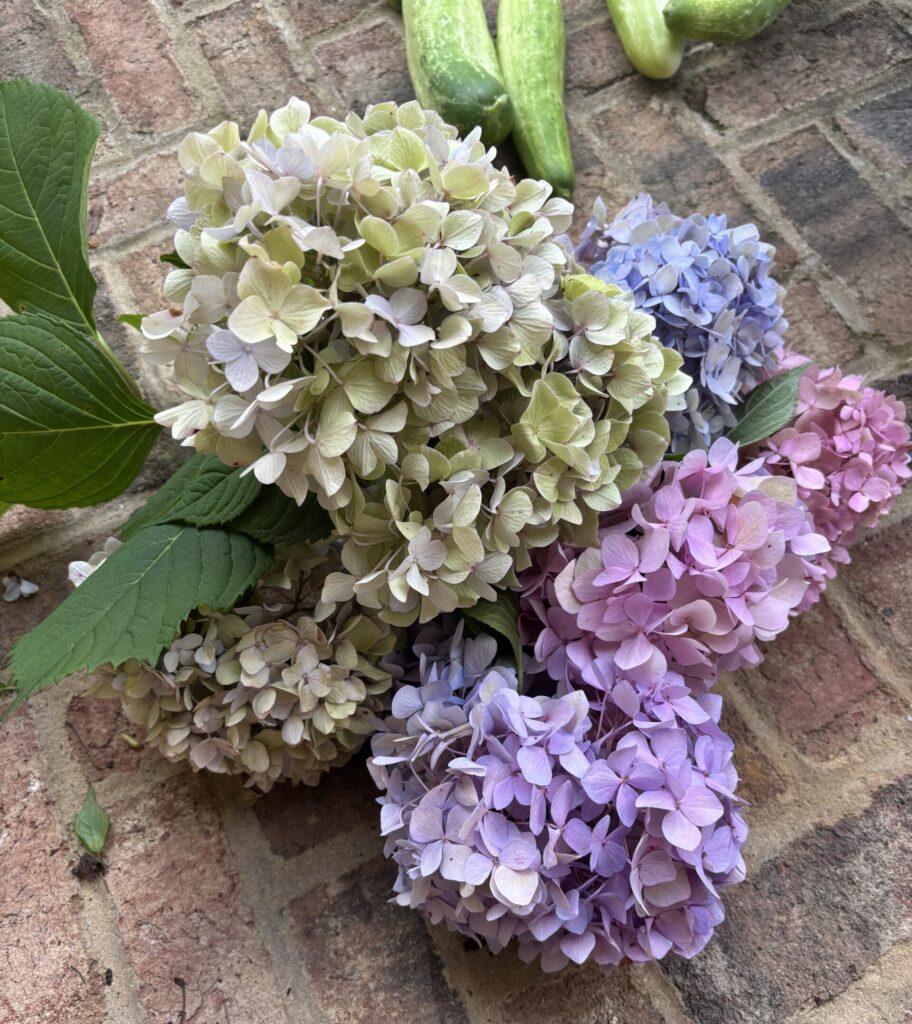
Clip hydrangea blooms with stems about 4–6 inches long. Try to harvest in the morning when they’re most hydrated. I’d recommend sticking your stems in water while you prepare/work. The key here is to cut blooms that are actually more ‘mature’. For instance, look at my photo above – you can see that the bloom on top that is more of a green/beige color is considered a mature bloom. It has a papery or leathery feel to it. This is what you’ll want to look for.
If you cut a hydrangea bloom too early in the bloom cycle when the petals are still soft and fresh then they tend to wilt and shrivel instead of drying beautifully. If you’re just making this for an event then it doesn’t matter as much.
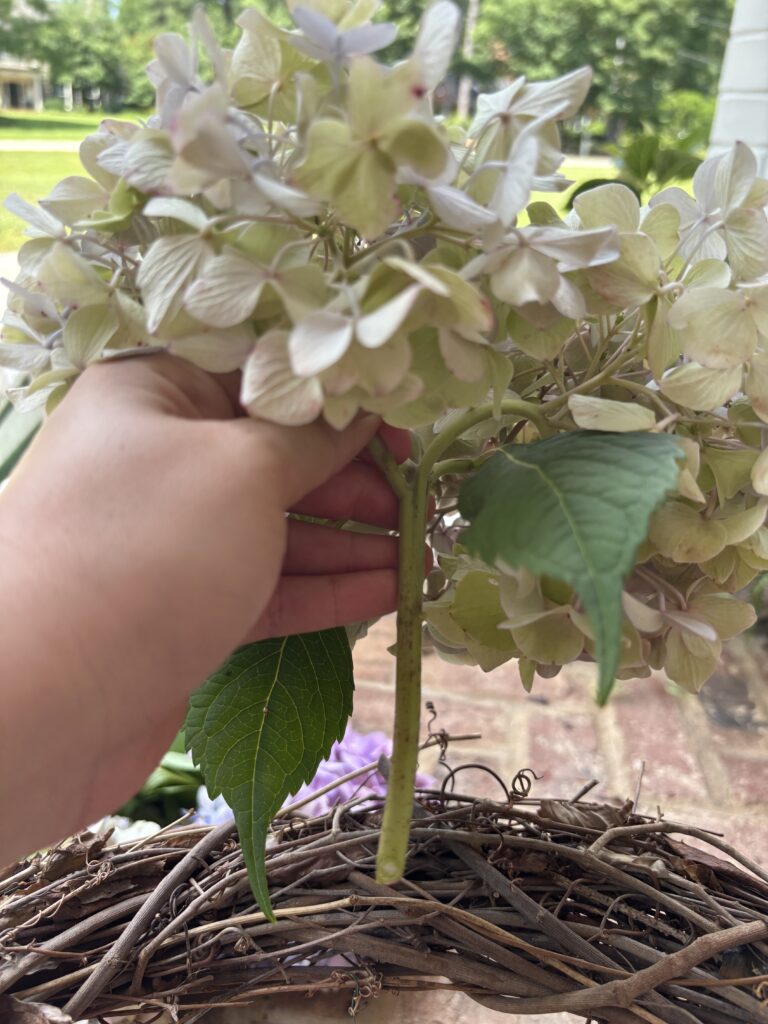
Step 3: Place and Stuff the Flowers
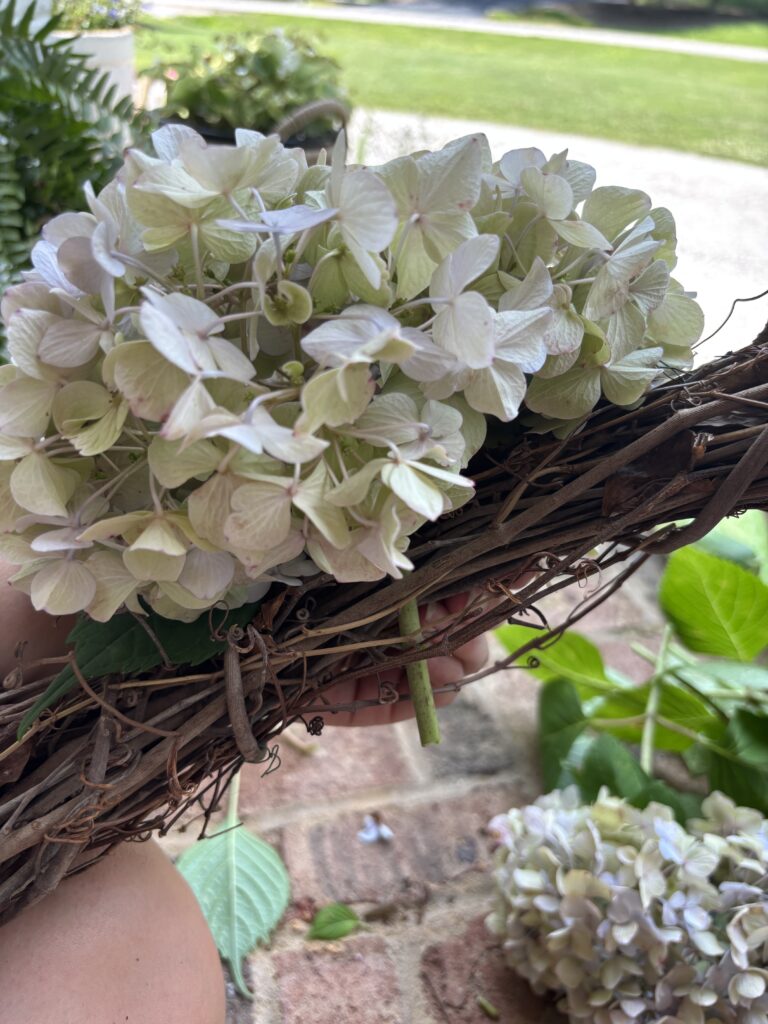
Tuck the stems directly into the grapevine wreath. If you need extra security, you can use floral wire to hold them in place. I didn’t use this because my blooms were large and I stuck the stems into tight spaces. Be sure to overlap blooms slightly for fullness. I didn’t place my stems in the middle of the wreath, I sort of alternated between the inside and outside of the wreath. Then if I felt there was a little gap I’d stick another stem.
I always test my wreaths by hanging them and stepping back to see if there’s an area I’ve missed or if when hung something doesn’t sit right. This allows me a chance to go back and grab extra stems, if necessary, or move a stem that may hang weird.
Step 4: Add Water Tubes
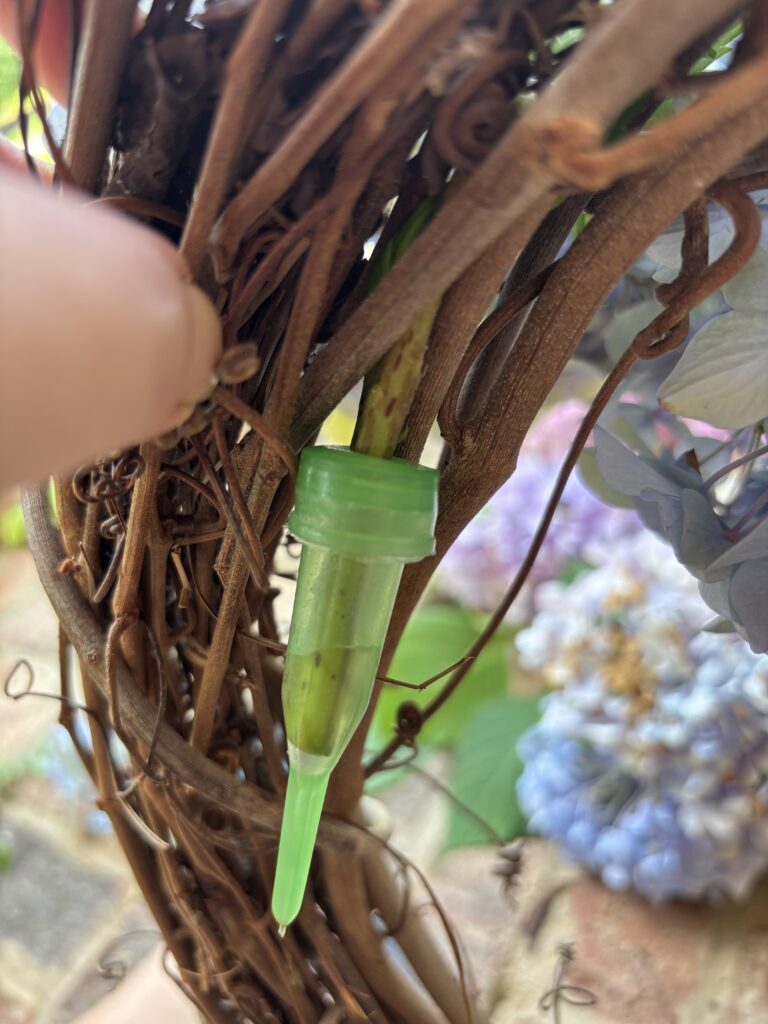
Once you’ve placed your stem(s) securely, slide the tube on the portion of the stem sticking out of the back side. The stem can be pushed through the top into the water. The tubes actually help to hold your stems in place so this is why I don’t use anything else to secure them.
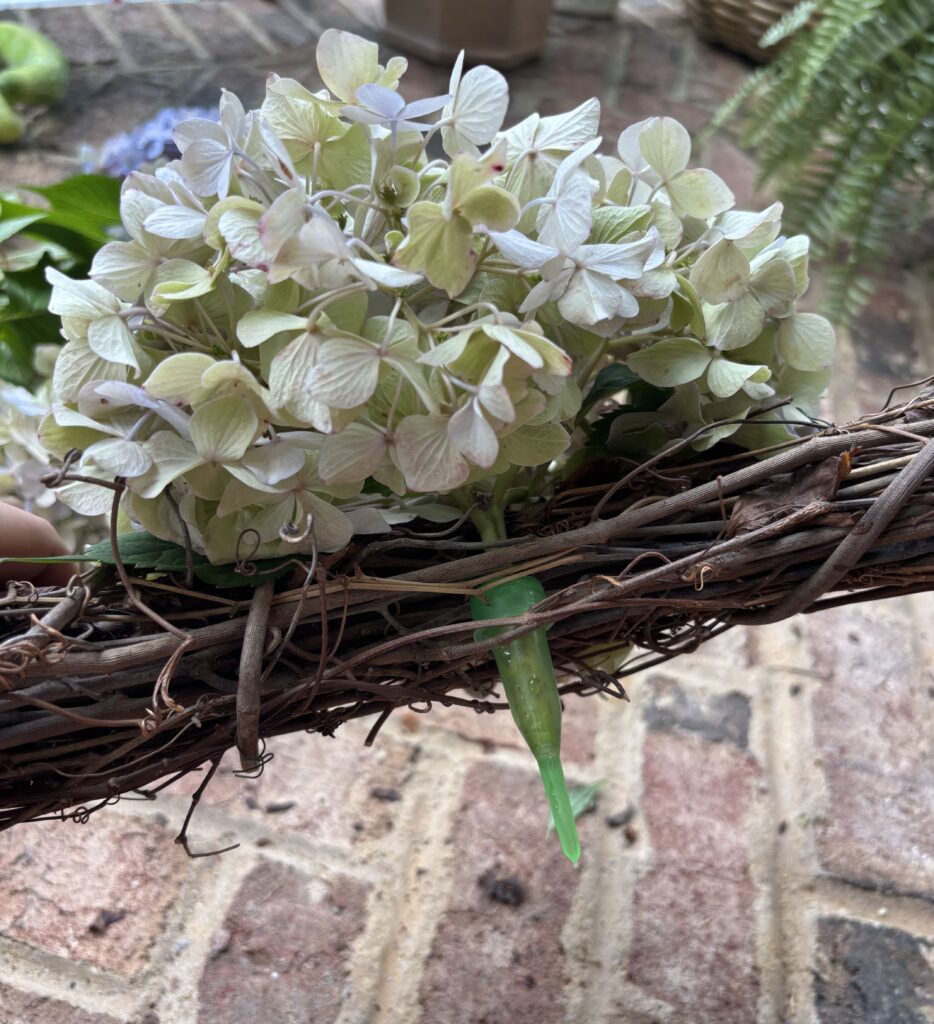
FYI – my front porch is shaded and covered on 3 sides so it doesn’t get direct sun or wind. If you’re afraid of wind or weather you might want to secure your stems more with floral wire.
Step 5: Hang and Enjoy!
I have 2 copper-colored adjustable wreath hangers on my front doors. My front doors are 8ft tall so to hang wreaths at the height I like I needed hangers that are longer than your average hanger. I got this 2 pack on Amazon and the copper color is perfect because it blends in with the styles on the doors perfectly.
As the blooms dry, they’ll maintain a soft, romantic look all summer long.
I hope that this flower wreath tutorial post gives you what you need to try this for yourself!
Frequently Asked Questions:
How long will a fresh hydrangea wreath last?
Fresh hydrangeas can last several days to a week before beginning to dry out. If you leave them on the wreath, they’ll naturally dry and continue to look beautiful for several weeks or more—especially in a shaded, protected outdoor area.
Can I use dried hydrangeas instead?
Of course! If you want a wreath that lasts for months, dry the blooms first and then attach them for a more permanent design. You won’t need the water tubes, of course, but you will need to secure them with floral wire since they will be dry and so much lighter.
Some of my stems dried out quickly and look bad, what should I do?
I always check on my wreaths and swap out any stems that just didn’t dry out as I had hoped. It does happen. Don’t worry, it’s not necessarily something you did wrong, just try to go clip some fresh stems that feel dry.

